Quick Leads-PCBA
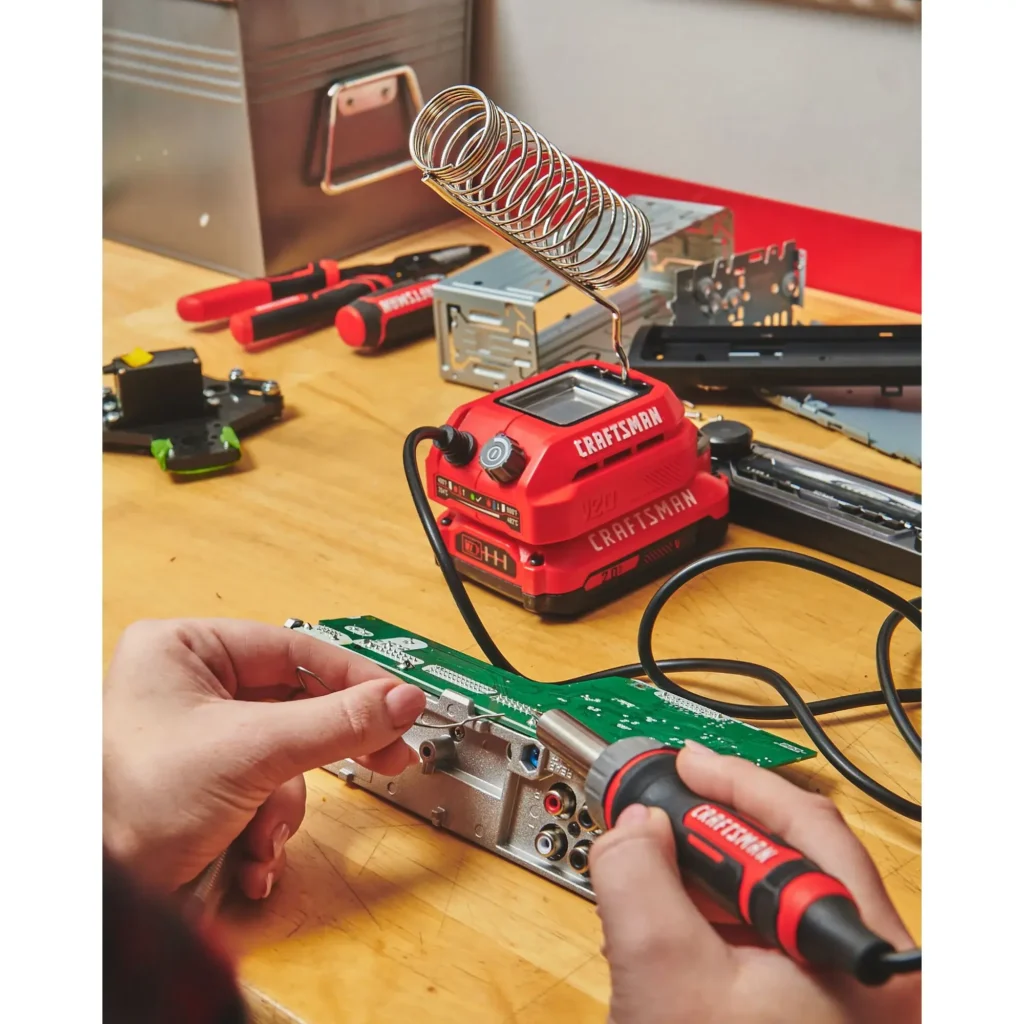
Soldering wires to a circuit board sounds simple—until it isn’t. Weak joints, damaged pads, and overheating can turn a repair job into a full replacement. In this guide, I’ll walk you through pro-level soldering techniques, safety tips, and insights from real PCB assembly challenges.
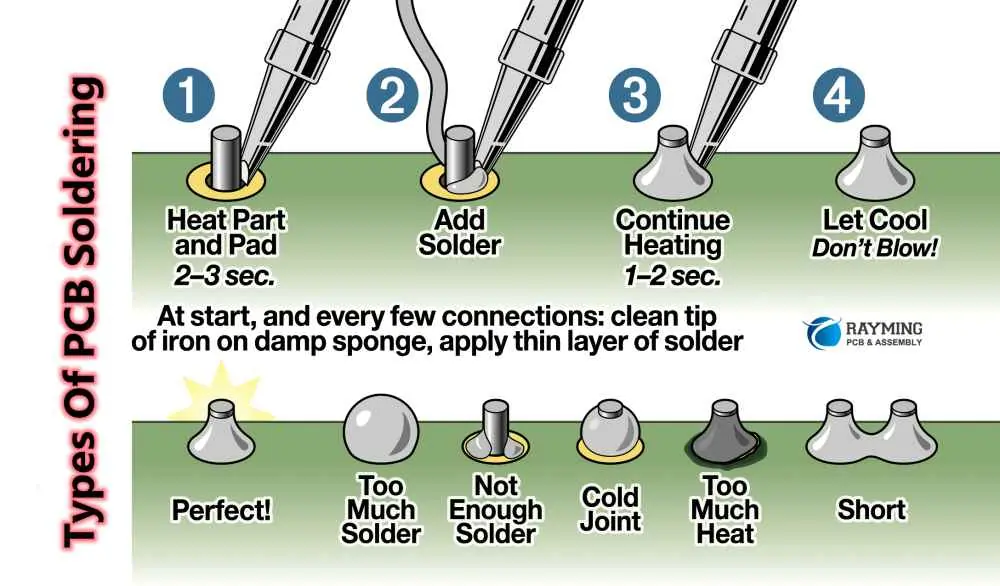
To solder wires to a circuit board, first strip and tin the wire, then insert or place it onto the prepped PCB pad. Use a soldering iron set to 330–380°C to heat the joint. Feed solder into the connection until it flows smoothly. Remove the heat and let it cool without moving. Always check for a shiny, solid joint and clean flux residue.
Let’s dive deeper into each step—and look at what engineers and procurement managers really need to know before trusting a PCB assembly provider.
🧰 1. What Tools Do You Need to Solder Wires to a PCB?
Whether you’re doing low-volume prototyping or managing an outsourced batch run, having the right tools makes or breaks the process. At minimum, here’s what I always keep on the bench:
-
Soldering Iron: A temperature-controlled iron is critical. Avoid the cheap plug-and-play pens.
-
Solder: Choose between leaded (easier to work with) and lead-free (RoHS-compliant).
-
Flux: Either rosin-core solder or external flux pens.
-
Solder Wick / Desoldering Pump: For cleanup or rework.
-
Wire Stripper: Precision cutters for consistent wire lengths.
-
PCB Cleaner: Isopropyl alcohol + brush for residue.
🔍 Leaded vs. Lead-Free Solder Comparison
| Feature | Leaded Solder (63/37) | Lead-Free Solder (SAC305) |
|---|---|---|
| Melting Point | ~183°C | ~217°C |
| Wetting Performance | Excellent | Fair |
| Ease of Use | Easier | Harder (oxidation issues) |
| Health/Safety | Toxic (needs fume extraction) | Safer |
| RoHS Compliant | ❌ No | ✅ Yes |
🔥 2. What Temperature Should You Solder PCB Wires At?
Most soldering faults begin with heat. Either the iron isn’t hot enough, or you’ve fried your board by hovering too long.
Ideal Range: 330°C to 380°C
Smaller joints/SMDs: 330°C
Thicker wires or ground planes: 370–380°C
Use lead-free solder? Bump it up ~20°C more than leaded.
Common Issues:
Cold joints (dull, grainy finish): Iron not hot enough.
Lifted pads: Too much heat for too long.
Bridging: Tip too wide or poor control of solder flow.
Always use a tip cleaner and never solder with oxidation buildup. That’s the #1 killer of heat transfer efficiency.
🛠️ 3. How to Prepare the PCB and Wires for Soldering
You wouldn’t paint without priming—same concept applies here.
✅ PCB Pad Preparation
Clean with isopropyl alcohol and a PCB brush.
Use a fiberglass pen to expose shiny copper if oxidized.
Tin the pad slightly if it’s not pre-tinned.
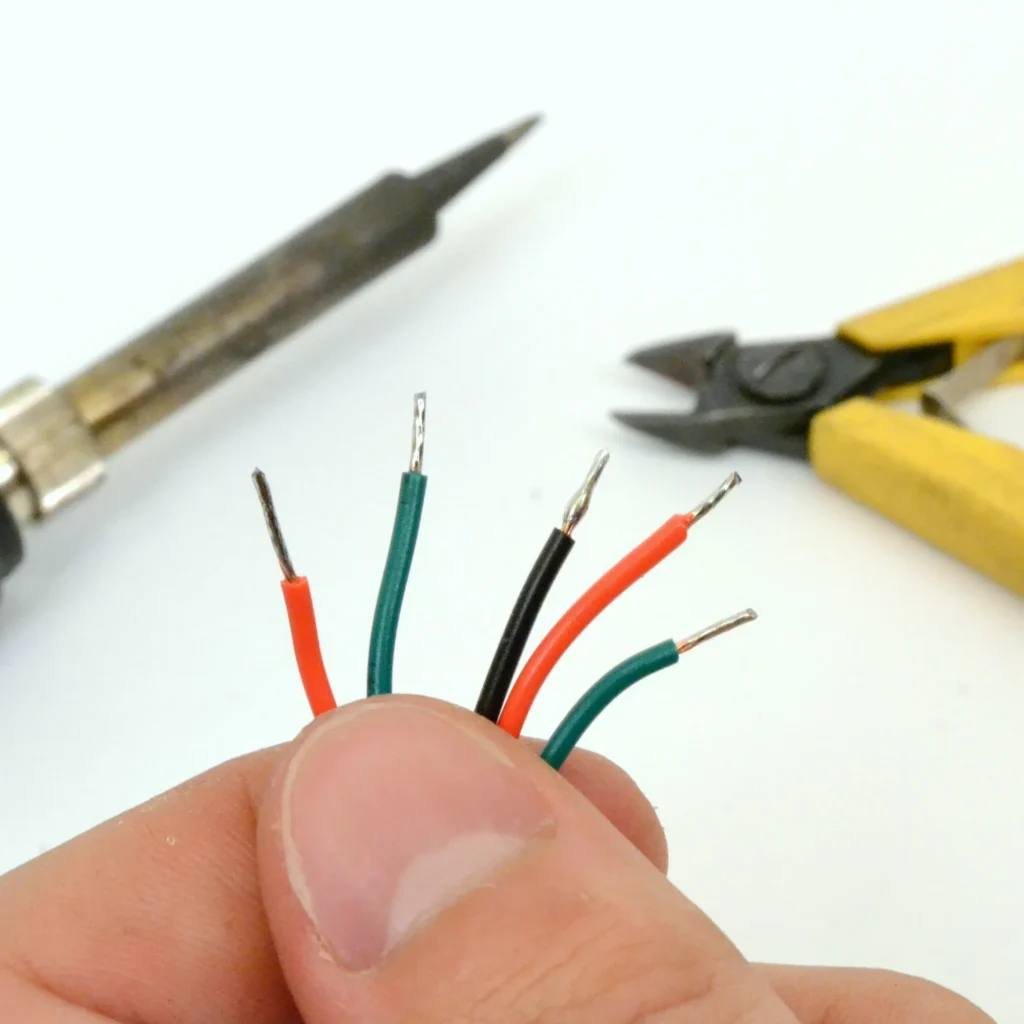
✅ Wire Preparation
Strip just enough insulation (~3–5mm).
Twist the strands tight.
Tin the wire tip: heat it and apply solder until shiny.
📊 Wire Stripping Length Chart by AWG
| Wire Gauge (AWG) | Strip Length (mm) |
|---|---|
| 22–24 | 3.0–3.5 |
| 18–20 | 4.0–4.5 |
| 14–16 | 5.0–6.0 |
Unit Circuits: Leading PCBA Manufacturer
 ISO-certified & 8+ years of PCBA Low MOQ & Fast Turnaround Prototype & Mass production
Limited Time Offer:
Get $100 off your order TODAY!
🎯 4. Step-by-Step Process: How to Solder Wires to a Circuit Board
Here’s the exact method I use and train my techs on.
✅ Through-Hole Soldering
Insert the wire into the plated hole.
Heat both the wire and pad simultaneously.
Feed in solder until it flows around the pin and hole.
Hold for 1–2 seconds, then remove the iron.
✅ Soldering to SMD Pads
Tin the pad and the wire separately first.
Place the wire on the pad, hold with tweezers.
Touch both with the iron just long enough to reflow.
✅ Soldering Multiple Wires to One Pad
Twist wires together and pre-tin.
Flatten the bundle slightly to distribute heat.
Apply solder carefully—don’t flood the pad.
✅ Add Strain Relief (always!)
Loop the wire through a nearby hole.
Add hot glue or epoxy if in a vibration-prone setup.
When dealing with tight footprints or sensitive zones, hand soldering may not be ideal. That’s where selective soldering comes in—read our guide to avoid costly mistakes in selective soldering for precise control in automated environments.
⚡ 5. Common Issues & Fixes
❌ Cold Solder Joints
Symptom: Dull, weak connection
Fix: Reheat the joint and add a small bit of fresh solder with flux.
❌ Burned Pads
Symptom: Pad peels off the PCB
Fix: Use a jumper wire to reroute the trace.
❌ Solder Bridges
Symptom: Short between pads
Fix: Wick it off or use a solder sucker.
❌ Oxidized Solder Tip
Symptom: Solder won’t flow
Fix: Clean the tip with brass wool or a tip tinner.
Even with experience, it’s easy to overlook heat transfer or bridging issues. For a deeper dive, check out our top methods to detect and prevent soldering defects in PCB assembly to minimize rework and ensure first-pass yield.

🧪 6. Quality Testing After Soldering: What Pros Look For
When it comes to production runs, manual inspection is not enough.
Visual Inspection Checklist
-
Is the joint shiny and conical?
-
Is the pad intact?
-
Are there bridges or voids?
Testing Techniques
-
Multimeter continuity check
-
Wiggle test (light physical stress)
-
Thermal cycling (simulate real-world heating)
🧩 7. Industry Pain Points in PCB Soldering & Our Solutions
🔥 Top Industry Challenges:
-
Inconsistent solder joints in hand-assembled prototypes
-
Lead-free reliability in high-power designs
-
Traceability in offshore assembly lines
-
Pad damage during rework
💡 Our Solutions:
-
Automated soldering for repeatable quality
-
IPC-A-610 trained technicians
-
100% QC with documented inspection reports
-
Hybrid leaded/lead-free processes per region
📊 Manual vs. Our PCB Assembly Comparison
| Criteria | Manual Soldering | Our Pro Assembly |
|---|---|---|
| Repeatability | ❌ Inconsistent | ✅ Fully controlled |
| Documentation | ❌ Rarely | ✅ Traceable process |
| Heat Control | ❌ Operator skill | ✅ Temperature profiling |
| Throughput | ❌ Low | ✅ High-volume capable |
🚀 8. What Kind of Solder Should You Use on a PCB?
✅ Best Choice for Beginners:
-
Leaded 63/37 solder, 0.6mm gauge
-
Lower melting point = less chance of burning pads
✅ Best for Commercial Use:
-
Lead-Free SAC305, 0.8mm gauge
-
Complies with RoHS and global standards
🌱 Rosin-Core vs. No-Clean Flux
-
Rosin-core is forgiving but needs cleaning.
-
No-clean is better for low-maintenance setups but can be less aggressive on oxidation.
🔗 9. Alternatives to Soldering Wires to PCB
Sometimes, soldering just isn’t the best option.
Options:
-
Wire-to-board connectors: Great for modular designs.
-
Crimp terminals: Secure and fast.
-
Conductive epoxy: No heat, but not reworkable.
-
Glue bonding + jumper wire: Quick fix, not ideal for signal lines.
🧑🏭 10. Final Pro Tips from the Lab Floor
-
Always tin both sides: It speeds up the joint and improves wetting.
-
Use magnification: Especially for SMD pads or multi-wire bundles.
-
Label wires: Sounds basic, but you’ll thank me later.
-
Slow is smooth, smooth is fast: Rushing ruins joints.
FAQs
1. What is the best solder for beginners working on circuit boards?
For beginners soldering a PCB, leaded 63/37 rosin-core solder is the easiest to work with. It melts quickly, wets well, and gives a shiny, strong joint—especially helpful for through-hole component soldering. If you're new to electronics, avoid lead-free solder initially due to its higher melting point and learning curve.
2. Why won’t solder stick or melt on a circuit board?
If solder won't melt or stick to your circuit board, the problem usually lies in poor heat transfer or oxidation. Clean your PCB pad thoroughly, use fresh flux for soldering PCB, and make sure your soldering iron is hot enough (330–380°C). Also, pre-tin the pad and wire to help bonding.
3. Do you need flux to solder a circuit board properly?
Yes—flux is essential for reliable soldering. It removes oxidation from surfaces, improves solder flow, and reduces cold joints. Whether you use rosin-core solder or add external flux, it's especially important when working with lead-free solder vs. leaded options, where oxidation is more common during higher-temp applications.
4. How do you reattach a wire to a circuit board without soldering?
While soldering is the most secure method, in emergencies you can use conductive epoxy or a wire-to-board connector. Just strip the wire, apply the conductive adhesive to the pad, and let it cure fully. Keep in mind: it’s less durable and not ideal for high-current paths or critical connections.
Have Specific Requirements?
Looking for high-precision PCB assembly for your products? Our team specializes in delivering top-tier assembly services, ensuring your devices perform flawlessly in any environment. Contact us today for a free consultation on how we can enhance your product’s reliability.
🟩 Summary
Whether you’re hand-soldering for a quick fix or sourcing high-volume PCB assembly, knowing the process ensures better results. Want our team to handle your next project with precision and accountability? Reach out—we’ll show you the difference.
Save on your next PCB project?
Claim $100 OFF your order today.
✅ high-quality PCB assembly with strict quality control ✅ ISO-certified & 8+ years of experience. ✅ Low MOQ, fast turnaround, and 100% E-tested PCBs.
Additional Resources:
- How to Repair Circuit Boards: A Step-by-Step Beginner’s Guide
- Capacitor on Circuit Board: A Comprehensive Guide
- What Are PCB Conformal Coatings? Types, Benefits, and Applications Explained
- SMD Size Codes Explained: A Complete Guide to Understanding Surface-Mount Component Dimensions
- AC vs DC: Key Differences, Applications, and Advantages in Modern Electronics
Request for Quote
RECENT POSTS
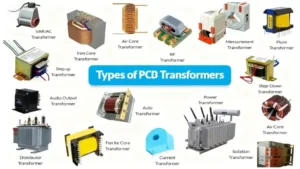
PCB Transformer Explained: Types, Working Principle, and Design Tips
Discover how PCB transformers work, their key types, and design integration tips. Learn to select
Why Smart OEMs Avoid Cheap PCB Assembly: 5 Hidden Risks That Cost More
Avoid costly mistakes in OEM projects. Discover why cheap PCB assembly risks quality, compliance, and
RELATED POSTS
Leading PCBA Manufacturer
✅ Assemble 20 PCBAS for $0 ✅ Get $100 OFF – Risk-Free Trial!
✅ 100+ Satisfied Customers
✅ Ensured Quality & On-Time Delivery
✅ Free Trial, No Commitments!